 Not a day goes by where we don’t get asked a question from a visitors who’s curious about how to best setup their hammock. Whether it’s setting it up on a balcony, in a bedroom, between two Jeeps, or just in the backyard – the situations are always different but the questions are often the same:
Installing a hammock is an easy way to create a relaxing and comfortable spot to enjoy the great outdoors. Many people find areas that are near trees, posts, or some type of shade, so that, when they’re ready to use it, they can easily crawl inside and take a short rest – or a long one, especially after a summer of home improvement projects! The other benefit to these locations is that it is easy to tie off the hammock ends to something firmly in the ground, thus making the installation process much smoother.
How far apart should the attachment points be? How high do they need to be to make sure the hammock isn’t touching the ground? Is __ feet apart too short/long to hang the hammock?
[NOTE: If your hammock has a metal or wooden spreader bar at each end then this guide won’t apply to your hammock.]
The Different Types of Hammocks:
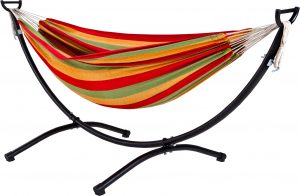
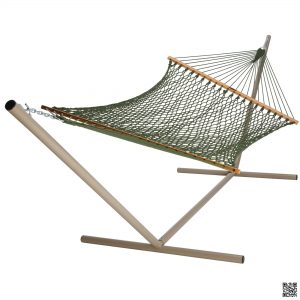
The first thing that you need for this process is the actual hammock. There are different sizes and varieties available, depending on your preference. For instance, some hammocks are made for two people, while others are great for just sitting rather than lying down. For installation in yards that don’t have any anchoring poles or trees available, there are hammocks that are freestanding, but they do require assembly.
What You Need To Install A Hammock:
The key to installing a hammock is to have a plan. Having the right tools available for the job will also go a long way to making this process flow much easier. Some of these tools are not mandatory, but are always good to have ready, just in case:
- Sledge hammer
- Stakes
- Measuring tape
- Plumb bob
 When your hammock is setup, the amount of curve (also referred to as sag) is going to be determined by the distance between the ends of your hammock. That distance can easily be measured by measuring across the empty space between each end of your hammock. This distance is commonly called the Hammock Ridgeline Length. You’re probably already thinking, “Wow, there’s a lot more to hanging a hammock than I realized!”. Well, yes and no. Hanging your Trek Light Hammock between two points can and should be as simple as eyeballing it once you’re used to it (and you can always make easy adjustments with our Go Anywhere Rope Kit). A tape measure definitely isn’t part of our backpacking kit! But, simply knowing the factors involved can be extremely helpful when it comes to understanding how it all comes together. And, if you’re looking to hang a hammock in a more permanent way (such as installing eyebolts in your wall or posts in your backyard) doing it ‘by the book’ with measurements is definitely the way to go to make sure the hammock hangs exactly the way you want it in the end. To break it down, when hanging a hammock you’re dealing with a combination of each of these factors to determine the final outcome:
- Distance between the two objects
- Height of attachment points (where you put the rope, straps or eye bolts)
- Hammock Ridgeline Length
- How high off the ground the hammock sits (think of it as chair height)
Another important safety factor you should take into consideration (especially when attaching to a wall or ceiling) is the amount of force being applied to your anchor points and suspension when you’re lying in the hammock. The amount of force being applied isn’t just dependent on how much weight you’ve got in the hammock as many think. It’s actually a combination of factors including the weight and the angle of your suspension (the angle between the cord and the tree as shown in the picture to the right). In a nutshell, the tighter you pull your hammock the greater the forces will be on the suspension and anchor points (another reason to hang loose!).
An approximate 30 degree angle is considered ideal. But don’t worry, you don’t need a protractor in your pack either, the angle will always be correct if you just follow the guidelines below. Exactly how tight or loose to hang the hammock can be a matter of personal preference, but there’s definitely a ‘sweet spot’ that creates the ideal hammock curve. For our Single and Double Hammocks that ridgeline length is around 9’ (108 inches) to get an ideal hammock curve. Which is a foot shorter, it’s closer to 8’ (96 inches).
Enjoy Your Summertime Snooze:
Enjoy your newly installed hammock with a nice cold glass of whatever you fancy. Hammocks are the type of feature that help to promote a restful afternoon outside in the fresh air. A healthy body is a rested one, and a place to take a break brings peace of mind as you lie suspended over the ground dozing off to sleep. Rest easy!
Did you know that if you subscribe to our website, you will receive email notifications whenever content changes or new content is added.
1. Enter your e-mail address below and click the Sign Me Up button.
2. You will receive an email asking you to confirm your intention of subscribing to our site.
3. Click the link in the email to confirm. That’s all there is to it! Note: if you wish to unsubscribe from our site, click the unsubscribe link at the bottom of the email you received.
Then indicate you no longer wish to receive our emails.
Thank You
Dialect Zone International